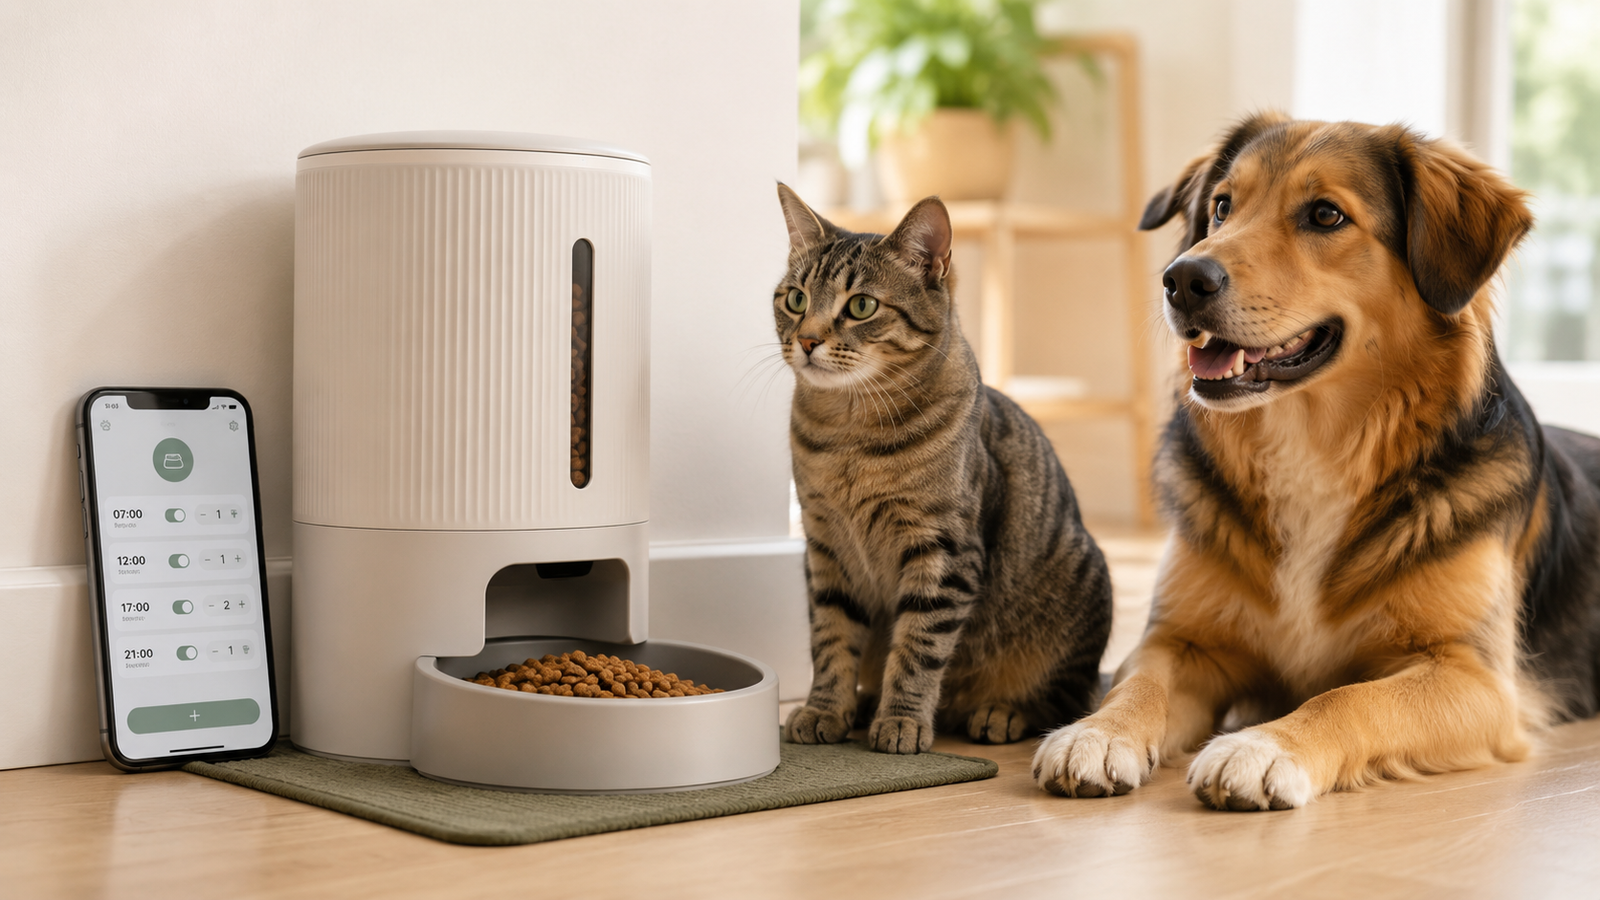
If you have just unboxed an automatic pet feeder, programming the buttons may be the easiest part. The more important task is deciding what to program. A feeder will dispense whatever schedule and portion you enter—even when that amount does not match what your cat or dog actually needs.
A safe, practical setup begins with your pet’s total daily food allowance. You then measure what one feeder “portion” actually dispenses, divide the daily allowance among suitable meal times, and test the complete schedule while you are home.
This guide explains how to set up an automatic pet feeder schedule, calibrate portion sizes, choose meal times for cats and dogs, connect a smart feeder to its app, and avoid common programming mistakes.
Important: An automatic feeder is a feeding tool—not a substitute for veterinary nutritional advice or daily supervision. Ask your veterinarian for an individualized feeding plan if your pet is very young, underweight, overweight, pregnant, nursing, elderly, diabetic, taking food-dependent medication, or living with another medical condition.
Quick Answer: How Do You Set an Automatic Pet Feeder Schedule?
First, confirm your pet’s total daily food allowance. Next, use the feeder’s manual-feed or test-feed function to weigh what one portion actually dispenses. Divide the daily food allowance by that average weight, distribute the resulting portions among suitable meals, set the feeder’s clock, and program each meal time and portion. Finally, supervise several complete feeding cycles before relying on the feeder when you are away.
Key Takeaways
- Start with your pet’s total daily food amount—not an arbitrary number of feeder portions.
- A feeder “portion” is usually a model-specific dispensing unit, not a standard tablespoon or cup.
- Weigh several test portions and calculate their average before programming the daily schedule.
- Increasing meal frequency should divide the same daily allowance, not add extra calories.
- Recalibrate the feeder whenever you change kibble.
- Test the complete schedule at home before leaving your pet dependent on it.
- A feeding notification may confirm dispensing, but it does not prove that your pet ate the meal.
Why a Well-Planned Feeding Schedule Matters
A carefully planned automatic pet feeder schedule can make daily feeding more predictable while helping owners measure each meal accurately. An automatic feeder can serve food while you are sleeping, working, or temporarily away from home. Its greatest benefit, however, is consistency.
A properly configured schedule may help you:
- Serve measured meals at predictable times
- Divide food into several smaller meals
- Control the total quantity dispensed each day
- Reduce accidental double-feeding by family members
- Manage early-morning demands for food
- Maintain a more consistent feeding routine
- Recognize appetite changes more easily
Scheduled meals can support portion control because the daily food allowance is measured instead of being continually topped up. The American Animal Hospital Association (AAHA) recommends measuring portions rather than estimating them and periodically adjusting the amount according to the pet’s weight and activity level. AAHA also notes that scheduled meals can help control portions and establish a routine. AAHA: 5 Ways to Know How Much to Feed Your Pet
The feeder itself cannot decide whether the programmed quantity is nutritionally appropriate. That depends on your pet’s individual calorie requirements and the calorie density of the food.
Before You Program the Feeder
Confirm That the Feeder Suits Your Pet’s Food
Most hopper-style automatic feeders are designed for dry kibble within a specified size and shape range. Kibble that is too large, irregularly shaped, oily, or crumbly may dispense inconsistently or obstruct the outlet.
Check the manufacturer’s instructions for:
- Compatible food type and kibble size
- Hopper capacity
- Minimum and maximum portion settings
- Maximum number of daily meals
- Recommended cleaning method
- Power and battery-backup requirements
- Wi-Fi requirements for app-connected models
Do not place wet, fresh, semi-moist, raw, or home-prepared food in an ordinary dry-food hopper. These foods require a feeder specifically designed to keep them covered and, where necessary, safely chilled.
Choose a Safe, Practical Location
Place the feeder:
- On a dry, level, stable floor
- In a quiet area where your pet feels comfortable
- Away from direct sunlight and excessive heat
- Away from water splashes
- Near a reliable electrical outlet, if required
- Within a stable Wi-Fi signal for a smart pet feeder
- Where another pet cannot easily steal the food
- Where you can notice uneaten food, ants, moisture, or a mechanical problem
If your pet tends to push, tip, or chew feeding equipment, secure the unit as the manufacturer recommends and supervise its initial use.
Wash and Dry the Food-Contact Parts
Before first use, wash the removable bowl and other washable food-contact components according to the manual. Dry them completely before adding kibble.
Do not immerse the motorized base or electrical components unless the manufacturer specifically identifies them as waterproof.
Install Backup Batteries When Supported
A feeder connected to household power may stop dispensing during an outage unless backup batteries are installed. Use only the battery type specified in the manual and replace the batteries when required.
Battery backup does not necessarily keep every smart feature working. Wi-Fi, cameras, app access, notifications, and remote commands may become unavailable even if locally stored meals continue to dispense.
Step 1: Confirm Your Pet’s Total Daily Food Allowance
Do not begin by guessing the size of each automatic meal. First, determine how much food your pet should receive during the entire day.
The feeding chart on a pet food package can offer a starting point, but it is not an individualized prescription. A pet’s actual requirements can vary with:
- Species and breed or body size
- Age and life stage
- Current and ideal weight
- Body and muscle condition
- Activity level
- Indoor or outdoor lifestyle
- Neutering status
- Pregnancy or nursing
- Health conditions
- Calorie density of the food
- Calories from treats, table food, and supplements
The World Small Animal Veterinary Association recommends an individualized nutritional assessment that considers factors such as body condition and calorie needs. Its resources include body-condition charts and calorie tools for dogs and cats. WSAVA Global Nutrition Guidelines
If your veterinarian provides a daily calorie target, use the calorie information on the food label to convert it into grams or cups. If the calorie information is unclear, contact the manufacturer or ask your veterinary team for help.
Include Treats in the Daily Total
Training rewards, dental treats, table food, and food-filled toys all add calories. AAHA advises keeping treats to no more than 10% of a pet’s total daily calorie intake so that they do not displace too much of a complete and balanced diet. AAHA Weight-Management Guidance
If you use your pet’s regular kibble as training rewards, remove that quantity from the food allocated to the feeder.
Step 2: Measure What One Feeder “Portion” Actually Dispenses
This is one of the most important—and most commonly skipped—setup steps.
A feeder’s “portion” is not necessarily a standard tablespoon, ounce, gram, or fraction of a cup. It is usually a manufacturer-defined dispensing unit. The actual weight can also change with the kibble’s size, shape, and density.
Accurate calibration is essential because every automatic pet feeder schedule depends on the amount the machine releases during each dispensing cycle.
Some feeders dispense small units, while others use larger fixed increments. Model-specific measurements should never be assumed to apply to another feeder. For example, PETLIBRO provides particular meal and portion instructions for its named Essential feeder models; those values apply to those models rather than automatic feeders generally. PETLIBRO Essential feeder scheduling instructions
How to Calibrate an Automatic Pet Feeder
- Fill the hopper with your pet’s usual dry food.
- Place an empty bowl under the dispensing outlet.
- Use the manual-feed or test-feed function to dispense one portion.
- Weigh the dispensed food on a digital kitchen scale.
- Empty the bowl and repeat the test at least five times.
- Add the measured weights and divide by the number of tests.
- Record the average weight of one feeder portion.
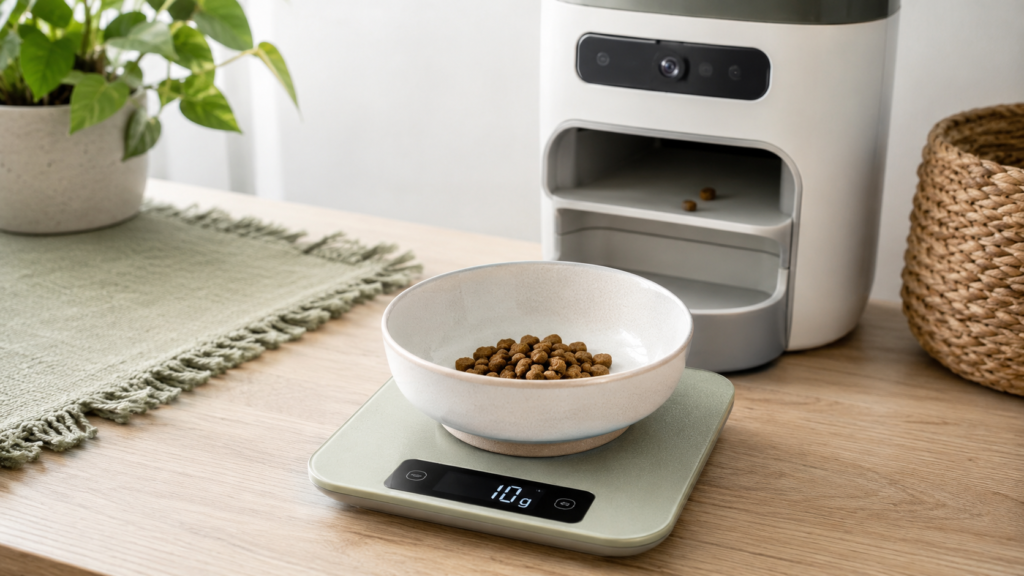
Suppose five tests produce 9 g, 10 g, 9 g, 11 g, and 10 g:
Total weight: 49 g
Average portion: 49 ÷ 5 = 9.8 g
If your pet’s intended daily allowance is 78 g:
78 ÷ 9.8 = approximately 8 feeder portions per day
Those eight units could be divided among three meals—for example, three portions in the morning, two at midday, and three in the evening.
Because most feeders use whole dispensing units, the total output may not equal the target perfectly. If the difference is meaningful, discuss a practical adjustment with your veterinarian rather than repeatedly guessing.
Recalibrate whenever you switch food. A different recipe or kibble shape may change both the weight dispensed per portion and the number of calories in that weight.
Automatic Pet Feeder Portion-Calculation Worksheet
Use this worksheet to record your feeder’s actual portion measurements and calculate a suitable daily feeding schedule.
| Measurement | Your result |
|---|---|
| Pet’s daily dry-food allowance | ______ grams |
| Test 1 — Weight of one portion | ______ grams |
| Test 2 — Weight of one portion | ______ grams |
| Test 3 — Weight of one portion | ______ grams |
| Test 4 — Weight of one portion | ______ grams |
| Test 5 — Weight of one portion | ______ grams |
| Average weight of one portion | ______ grams |
| Total feeder portions per day | ______ portions |
| Number of scheduled meals | ______ meals |
| Portions allocated to each meal | ______ portions |
Step 1 — Calculate average portion weight
Add the five test weights and divide by five.
Step 2 — Calculate daily feeder portions
Daily dry-food allowance ÷ average portion weight = approximate number of feeder portions per day.
Step 3 — Distribute portions among meals
Assign the daily portions to your chosen meal times. Check the actual dispensed weight because feeders may only accept whole-number portion settings.
Important: This worksheet is a calculation aid, not a veterinary feeding prescription. Confirm the appropriate daily allowance for your pet, account for treats and other food, and recalibrate whenever you change kibble.
Step 3: Choose the Number of Meals
There is no single feeding frequency suitable for every cat or dog. The right number of meals depends on life stage, health, behavior, household routine, and veterinary guidance.
Automatic Feeder Schedule for Adult Cats
Many cats naturally prefer several small meals. An automatic cat feeder can divide the daily ration into smaller servings without increasing the total amount of food.
For a healthy adult cat, a practical schedule may include:
- Two measured meals per day, or
- Three to five smaller meals distributed across the day
Veterinary guidance commonly recommends at least two meals per day for adult cats, although individual needs differ. VCA: Feeding Times and Frequency for Cats
Several smaller scheduled meals may suit cats that eat too quickly, wake their owners early for food, or appear more comfortable with frequent servings. The key is to divide the same daily allowance rather than add more calories.
Automatic Feeder Schedule for Adult Dogs
Many healthy adult dogs do well with their daily food allowance divided into two meals. Some may benefit from three smaller meals, depending on their size, routine, digestive comfort, and veterinary advice.
VCA notes that many dogs benefit from equally divided meals two or three times per day, while younger puppies may require more frequent feeding. VCA: General Feeding Guidelines for Dogs
Avoid making a major change to a dog’s meal or exercise routine without veterinary guidance—particularly if the dog has an individual digestive or health risk.
Puppies and Kittens
Growing pets generally need more frequent meals and carefully adjusted nutrition. Their requirements change as they mature, so one permanent automatic feeder schedule is inappropriate.
Ask your veterinarian to confirm:
- The appropriate growth diet
- The daily calorie or food quantity
- The number and timing of meals
- When to reduce meal frequency
- How often to reassess weight and body condition
Young puppies and kittens also need close observation. An unattended feeder should not be their only source of care.
Pets with Medical Conditions
Veterinary guidance is essential for pets with diabetes, gastrointestinal disease, kidney disease, food allergies, poor appetite, weight problems, or medication that must accompany food.
Meal timing may be linked to medication, insulin, or clinical monitoring. Do not change a medically important feeding schedule merely for convenience.
Step 4: Select Practical Meal Times
Choose feeding times that are sustainable for your household and appropriate for your pet. The best automatic pet feeder schedule is one that meets your pet’s nutritional needs and remains practical for your household.
A useful schedule generally:
- Distributes food across the day
- Avoids unnecessarily long gaps
- Remains reasonably consistent
- Allows you to observe at least one meal
- Fits medication or veterinary requirements
- Works with your pet’s exercise and sleep routine
Example Automatic Feeder Schedules
The following examples show how a daily allowance might be distributed. They are not universal feeding prescriptions.
| Pet and frequency | Example meal times | Share of daily feeder allowance |
|---|---|---|
| Adult cat—2 meals | 7:00 a.m. and 7:00 p.m. | 50% and 50% |
| Adult cat—4 meals | 6:30 a.m., noon, 6:00 p.m., and 10:30 p.m. | Approximately 25% each |
| Adult dog—2 meals | 7:00 a.m. and 6:00 p.m. | 50% and 50% |
| Adult dog—3 meals | 7:00 a.m., 1:00 p.m., and 7:00 p.m. | Approximately one-third each |
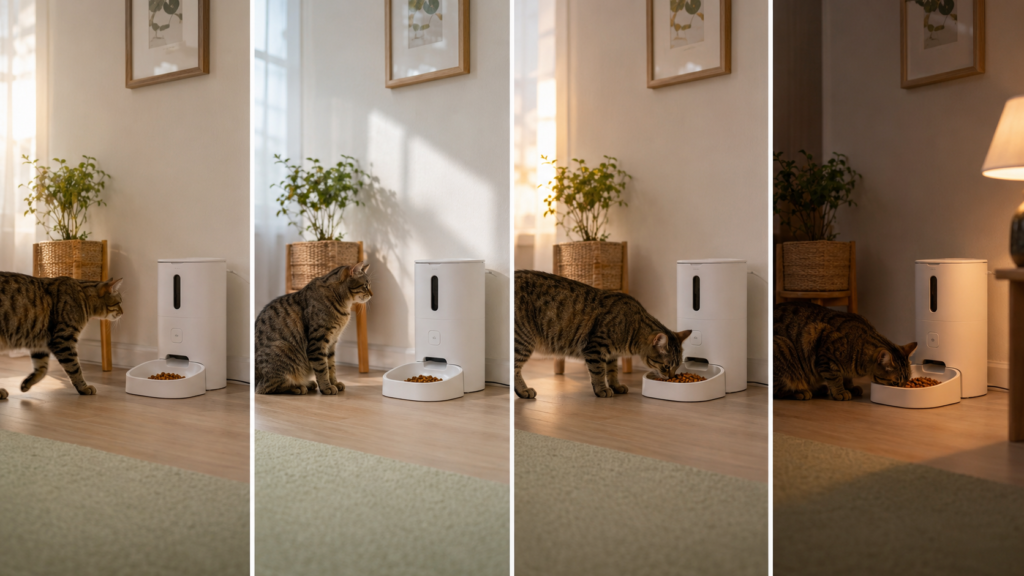
Equal portions are easy to manage, but they are not mandatory. A pet may receive a slightly larger meal while you are present and smaller servings at other times, provided the total daily allowance remains correct.
Step 5: Set the Feeder’s Clock Correctly
An incorrect clock produces meals at the wrong time even when the meal schedule itself is correct.
Before programming meals:
- Confirm whether the feeder uses a 12-hour or 24-hour clock.
- Set the correct local time.
- Check a.m. and p.m. carefully.
- Confirm the date and time zone in the app, where applicable.
- Check how the feeder handles daylight-saving changes in regions that use them.
- Save the settings before leaving the clock menu.
Some feeders retain their schedule after losing power, while others may reset the clock or program. Recheck the schedule after a power outage, battery replacement, reset, firmware update, or Wi-Fi reconnection.
Step 6: Program Meals Through the Control Panel
The exact sequence differs among models, but many control-panel feeders follow a similar process:
- Unlock the controls if a lock symbol is displayed.
- Open the clock or meal-setting menu.
- Select the number of daily meals.
- Choose the hour and minute for Meal 1.
- Select the number of portions for Meal 1.
- Save the setting.
- Repeat the process for each additional meal.
- Review all programmed times and portions.
- Lock the controls if the feeder supports that feature.
Some feeders offer scheduled feeding, manual snacks, and gravity-style bowl top-offs. These modes are not interchangeable. Confirm that you have selected the automatic scheduled-feeding mode.
If you use the manual-feed or snack button during the day, count that food toward your pet’s total daily allowance. An extra manual dispense is additional food unless you reduce another meal accordingly, so repeated “snacks” can unintentionally defeat an otherwise accurate portion-control schedule.
For example, Feeder-Robot distinguishes between automatic scheduling, manual snack dispensing, and gravity-feed operation. Its increments and limits are specific to that product. Feeder-Robot control-panel instructions
How Programming Settings Differ Between Automatic Pet Feeders
Although the basic programming process is similar, automatic pet feeders can differ in the number of scheduled meals and how they measure portions.
| Feeder model | Meal scheduling | Portion settings |
|---|---|---|
| PETLIBRO Essential (AF001/AF002/PLAF001/PLAF002) | 1–4 meals per day | 1–9 portions per meal; each portion is approximately 12.5 mL by volume |
| PetSafe Healthy Pet Simply Feed | Up to 12 meals per day | Adjustable meal sizes using 1/8-cup increments |
For model-specific instructions, consult the official PETLIBRO programming guide or the official PetSafe setup guide.
Important: Portion settings do not necessarily represent a fixed weight in grams. Actual dispensed weight depends on the feeder mechanism and kibble. Use a kitchen scale to calibrate portions before relying on an automatic feeding schedule.
These specifications apply only to the named models. Always check your own feeder’s manual.
Step 7: Connect and Program a Smart Pet Feeder App
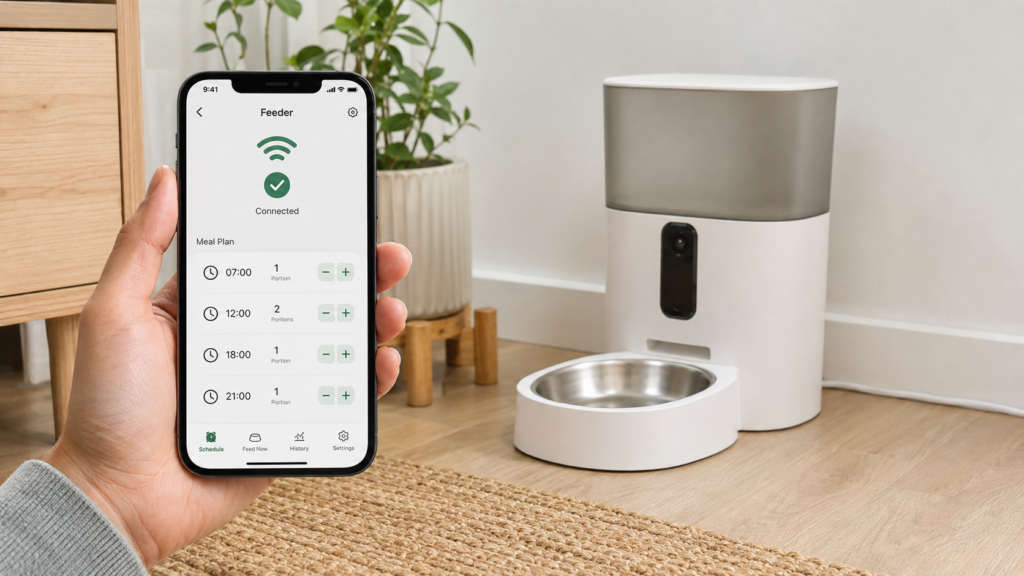
For a Wi-Fi automatic feeder, the general setup process is:
- Download the manufacturer’s official app from the appropriate app store.
- Create an account or sign in.
- Turn on the feeder and activate pairing mode.
- Select the correct model in the app.
- Scan its QR code or enter the requested device information.
- Connect the feeder to a supported Wi-Fi network.
- Name the feeder and assign it to your pet, if the app allows this.
- Set each meal time and portion.
- If the app allows different schedules by day, confirm that each meal is enabled for the correct days of the week. A meal can have the correct time and portion but still be skipped because the wrong days were selected.
- Enable useful alerts.
- Save and review the complete schedule.
Many connected pet devices use 2.4 GHz Wi-Fi, but compatibility varies. Check the specifications for your model rather than assuming it supports a particular network band.
Useful Smart-Feeder Notifications
Depending on the model, alerts may be available for:
- Successful meal dispensing
- Low food level
- Empty hopper
- Food outlet blockage
- Low battery
- Offline status
- Motor or sensor error
- A missed or failed feeding
Notifications are useful, but they may only confirm that the feeder attempted or completed a dispensing cycle. They do not necessarily prove that the correct quantity entered the bowl or that your pet ate it. Continue checking the bowl, feeding history, and your pet’s appetite.
Step 8: Test the Complete Schedule
Do not program a new feeder and immediately leave your pet dependent on it for an extended period.
Recheck the complete schedule whenever you edit an existing meal, add or remove a meal, or change the number of daily feedings. Confirm that previously programmed meals still have the intended times, portions, and active days before relying on the updated schedule.
Run a supervised test for several days: Testing the complete automatic pet feeder schedule helps identify incorrect times, inconsistent portions, connectivity problems, or food blockages before your pet depends on the device.
- Trigger a manual portion
- Watch the outlet for jams
- Confirm every scheduled meal occurs at the intended time
- Compare the output with your calibration measurements
- Check that the bowl remains correctly aligned
- Make sure your pet is comfortable with the motor sound
- Confirm that another pet cannot take the food
- Test battery operation if the model supports it
- Review app notifications and feeding history
A feeder may appear to work normally while dispensing slightly inconsistent quantities, especially with irregular kibble. Continue checking its actual output periodically.
A successful manual dispense test does not confirm that the programmed schedule itself is correct. Consider the setup verified only when a scheduled meal occurs at the correct time, dispenses the expected measured amount, delivers the food into the bowl, and leaves the intended pet able to access the meal. Before relying on the feeder unattended, observe at least one automatically scheduled meal and verify the time, portion output, and bowl delivery.
Step 9: Introduce Your Pet Gradually
Some pets accept an automatic feeder immediately. Others may be startled by its motor or confused when food appears without a person nearby.
To make the transition easier:
- Place the unplugged feeder near the pet’s usual feeding area.
- Serve food manually in its bowl for several meals.
- Run a manual dispensing cycle while you remain nearby.
- Reward calm investigation without forcing interaction.
- Begin with one automatic meal.
- Gradually transfer the remaining meals to the feeder.
If your pet refuses to eat or remains frightened, return temporarily to the familiar bowl and reintroduce the feeder more slowly.
If your cat remains hesitant, frightened by the dispensing sound, or refuses to eat from the feeder, follow our step-by-step guide to training your cat to use an automatic feeder.
Portion-Control Mistakes to Avoid
Estimating Instead of Weighing
A digital kitchen scale is more precise than estimating kibble with a cup or scoop. Measuring in grams also makes it easier to compare the actual feeder output with the intended daily allowance.
Forgetting Food Given Elsewhere
Count all sources of calories, including:
- Automatic feeder meals
- Hand-fed meals
- Training rewards
- Dental treats
- Food-filled toys
- Table food
- Calorie-containing supplements
A correctly programmed feeder can still contribute to overfeeding when extra food is not included in the daily total.
Confusing Portions with Meals
If an app displays “four portions,” that may mean four dispensing units within one meal—not four separate meals.
Use this check:
Number of meals × portions per meal = total feeder portions per day
Then confirm that the total portions correspond to the intended daily food weight.
Failing to Recalibrate After Changing Food
Different kibble can vary substantially in calories per cup and grams per feeder portion. Keeping the same numerical setting after changing food may unintentionally increase or reduce calorie intake.
Transition diets gradually according to veterinary or food-manufacturer guidance, and recalibrate the feeder using the new kibble.
Ignoring Weight and Body-Condition Changes
Monitor your pet’s weight and body condition regularly. If weight rises or falls unexpectedly, review the total intake rather than making repeated large adjustments based on guesswork. Ask your veterinarian to help assess the feeding plan.
Not Keeping a Feeding Record
A simple record can include:
- Food brand and recipe
- Calories per cup or kilogram
- Target daily quantity
- Average weight per feeder portion
- Number and timing of meals
- Portions assigned to each meal
- Daily treat allowance
- Date and result of the latest weight check
This information makes troubleshooting and veterinary discussions easier.
Using an Automatic Feeder in a Multi-Pet Home
A standard open-bowl feeder cannot guarantee which animal eats the food. One pet may consume its own meal and then steal another’s.
Possible solutions include:
- Feeding pets in separate rooms
- Using multiple feeders positioned apart
- Supervising scheduled meals
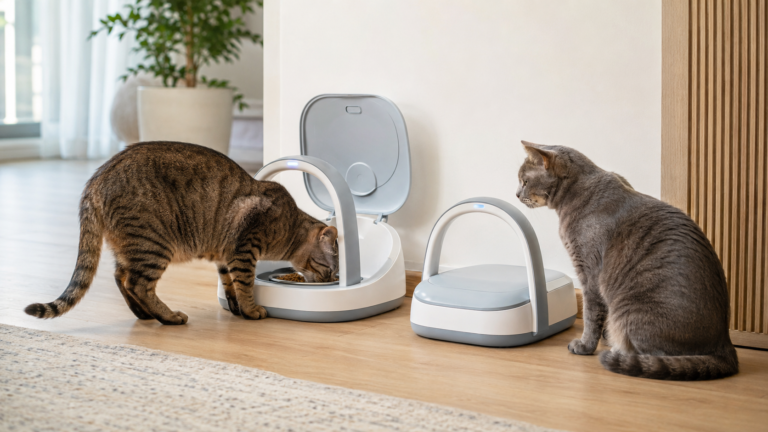
- Choosing a microchip- or RFID-controlled feeder
- Physically separating pets when different diets are required
VCA recommends measured quantities in separate bowls to reduce the risk of individual pets being overfed or underfed. VCA: Feeding Multiple Pets
If one pet guards food or the animals require different diets, physical separation is usually more dependable than timing alone.
For households where food stealing, different portion needs, or separate diets make scheduling more complicated, see our guide to automatic feeders for multiple cats.
Troubleshooting Common Automatic Feeder Schedule Problems
Quick Automatic Pet Feeder Troubleshooting Guide
Use this table to identify common feeding-schedule problems. Follow the detailed troubleshooting instructions below if the problem continues.
| Problem | Possible cause | What to check first |
|---|---|---|
| Feeder dispenses too much or too little | Incorrect portion settings, unsuitable kibble, or duplicate feeding schedules | Recheck programmed portions, inspect the kibble, and weigh test dispenses |
| Meals arrive at the wrong time | Incorrect clock, a.m./p.m. setting, or time zone | Verify the feeder’s clock, time format, and app settings |
| Feeder skips a scheduled meal | Disabled meal, empty hopper, blockage, or power problem | Check the feeding schedule, food supply, outlet, and power source |
| Smart feeder goes offline | Wi-Fi or connectivity problem | Check the connection and verify whether the feeder retains its local schedule |
| Pet eats too quickly | Meal size or eating behavior | Consider smaller, more frequent meals without increasing the daily food allowance |
Safety reminder: If a meal is missed, confirm what food was actually dispensed before providing a replacement meal. This helps avoid accidental double-feeding.
The Feeder Dispenses Too Much or Too Little
Possible causes include:
- An incorrect portion calculation
- Confusion between cups, grams, and feeder units
- Unsuitable kibble size or shape
- A change in food density
- Duplicate schedules in the app
- Accidental manual feeds
- Extra food provided by another household member
Recalibrate the output and compare the total dispensed food with the intended daily allowance.
Meals Dispensed at the Wrong Time
Check:
- A.m. versus p.m.
- 12-hour versus 24-hour time format
- Time zone
- Daylight-saving changes, where applicable
- Whether the internal clock reset after a power interruption
- Whether the app and feeder clocks are synchronized
The Feeder Skips a Meal
Inspect for:
- An empty hopper
- Kibble lodged in the outlet
- Incorrect assembly
- Loss of power
- Depleted backup batteries
- A motor or sensor error
- A disabled meal
- A portion setting accidentally changed to zero
Provide food manually when a meal is confirmed as missed. If you are uncertain whether the first meal was delivered, inspect the bowl and feeding log carefully so you do not accidentally provide a second full meal.
The Feeder Goes Offline
Some feeders retain locally stored schedules without an internet connection, while others may lose remote functions. Check the manual for the behavior of your model.
Restore the connection, restart the feeder only as directed, and then verify that the clock and feeding schedule remain correct.
If offline feeding is important in your household, learn what may continue working during Wi-Fi, internet, or power interruptions in our guide to automatic pet feeders without Wi-Fi.
Your Pet Eats Too Quickly
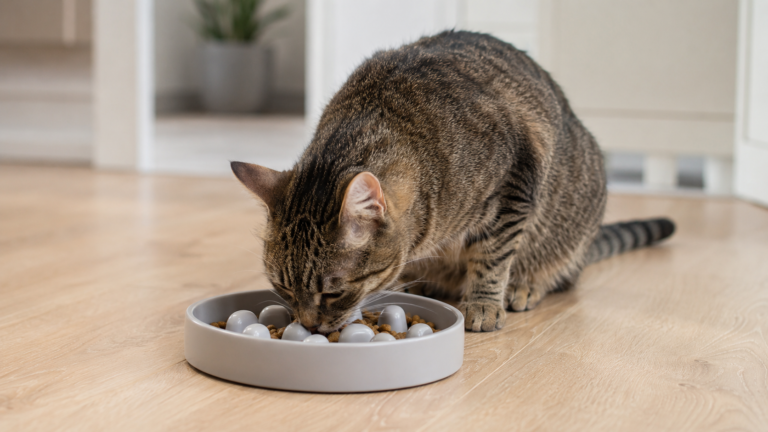
Consider dividing the same daily ration into more frequent, smaller meals. A compatible slow-feeder bowl or food puzzle may also help, provided it does not obstruct the dispensing outlet.
Persistent gulping, vomiting, regurgitation, or unusual hunger should be discussed with a veterinarian.
Cleaning and Maintenance
A dependable feeding schedule also requires a clean, unobstructed feeder.
Follow the manufacturer’s instructions and:
- Wash the bowl regularly
- Remove food dust and crumbs
- Inspect the dispensing outlet
- Wipe the feeder’s exterior
- Keep the hopper dry
- Replace desiccant packs where applicable
- Check seals and moving parts
- Examine the power cord
- Test or replace backup batteries
- Discard stale, damp, or contaminated food
Avoid continually adding fresh kibble on top of old food. Periodically empty and clean the hopper so older pieces do not remain at the bottom.
For a complete cleaning routine, see How to Clean an Automatic Pet Feeder: A Step-by-Step Guide for Safe, Hygienic Feeding.
When an Automatic Feeder Should Not Be Left Unsupervised
Extra caution is needed when:
- Your pet is not eating normally
- Medication must accompany a confirmed meal
- A medical condition requires close monitoring
- Wet food cannot be kept at a safe temperature
- Another pet may steal the food
- The feeder has recently jammed or failed
- Your pet chews, pushes, or tips the feeder
- You are still testing a new schedule
An automatic feeder does not replace fresh water, exercise, litter-box or toileting care, social contact, health observation, or an attentive caregiver during travel.
Frequently Asked Questions
What Is the Ideal Feeding Schedule for an Automatic Cat Feeder?
There is no single ideal automatic cat feeder schedule for every cat. Start with your cat’s total daily food allowance, then divide it among meal times appropriate for the cat’s age, health, weight, eating behavior, and veterinary feeding plan. Many healthy adult cats can be fed at least twice daily, while some may do well with several smaller scheduled meals. Increasing meal frequency should divide the same daily allowance rather than increase the total amount of food.
How Do You Program an Automatic Pet Feeder?
Check the instructions for your exact feeder because programming steps vary by model. In general, set the feeder’s clock first, select each meal time, choose the number of portions for that meal, save the schedule, and review all programmed meals before exiting the settings menu. Then observe at least one scheduled feeding to confirm that the feeder dispenses at the correct time and in the expected amount.
How Do You Set the Time on an Automatic Pet Feeder?
Open the feeder’s clock or time settings and set the correct local time, checking whether the device uses a 12-hour or 24-hour format. Verify a.m. and p.m., and check the date and time zone on app-connected models where applicable. Save the setting, then confirm the clock again after a power interruption, reset, battery replacement, or other event that may affect the feeder’s stored time.
How Many Times a Day Should I Set an Automatic Pet Feeder?
Many healthy adult cats and dogs receive at least two measured meals per day. Some cats and dogs may benefit from several smaller meals, while puppies, kittens, and pets with medical conditions often require individualized schedules. Ask your veterinarian if you are unsure.
How Do I Calculate Portions for an Automatic Feeder?
Confirm the total daily food requirement, measure the average weight dispensed as one feeder portion, and divide the daily food weight by that average. Distribute the resulting number of portions among the scheduled meals without exceeding the intended daily total.
Is One Feeder Portion Equal to One Tablespoon?
Not necessarily. “Portion” usually means a model-specific dispensing unit. Its actual weight depends on the feeder and kibble, so weigh several test portions rather than assuming a standard volume.
Can an Automatic Feeder Help Prevent Overfeeding?
It can support portion control by dispensing measured meals, but only when the daily allowance is appropriate and all treats and additional food are counted. It cannot determine your pet’s correct calorie intake by itself.
Can an Automatic Feeder Help a Pet Lose Weight?
It may support a veterinarian-approved weight-management plan by dispensing measured meals. It cannot independently determine a safe calorie restriction, however. Weight loss should be planned and monitored with veterinary guidance, especially for cats.
Should I Leave an Automatic Feeder Running While I Travel?
Only after it has operated reliably under supervision. Arrange for a responsible person to check your pet, food supply, water, and feeder. An automatic feeder should not be the pet’s only source of care while you are away.
What Happens if the Power Goes Out?
A feeder with correctly installed backup batteries may continue dispensing locally stored meals, but Wi-Fi and remote features may stop. Test the backup system in advance and check the instructions for your model.
Can I Use Wet Food in an Automatic Feeder?
Only use wet food in a feeder specifically designed for it. Ordinary dry food hoppers do not provide the refrigeration or moisture control that perishable food may require.
How Often Should I Check the Feeder Schedule?
Review it after the initial setup, a power interruption, battery replacement, reset, app or firmware update, Wi-Fi reconnection, clock change, or food change. Periodically confirm the actual dispensed quantity even when the feeder appears to work normally.
Why Is My Automatic Feeder Dispensing the Wrong Amount?
The likely causes include unsuitable kibble, an incorrect portion calculation, duplicate schedules, extra manual feeds, or a change in kibble size or density. Clear any blockage, review the program, and recalibrate the output using a kitchen scale.
Final Recap
A reliable automatic pet feeder schedule starts with your pet’s total daily nutritional requirement—not with whatever number appears on the feeder’s display.
Confirm the daily allowance, measure what one portion actually weighs, divide that allowance among appropriate meal times, set the clock carefully, and supervise several complete feeding cycles. Recalibrate after changing food, account for treats, and continue checking your pet’s appetite, weight, and body condition.
When properly programmed and monitored, an automatic feeder can make scheduled feeding more consistent and portion control easier. It should support attentive pet care—not replace it.