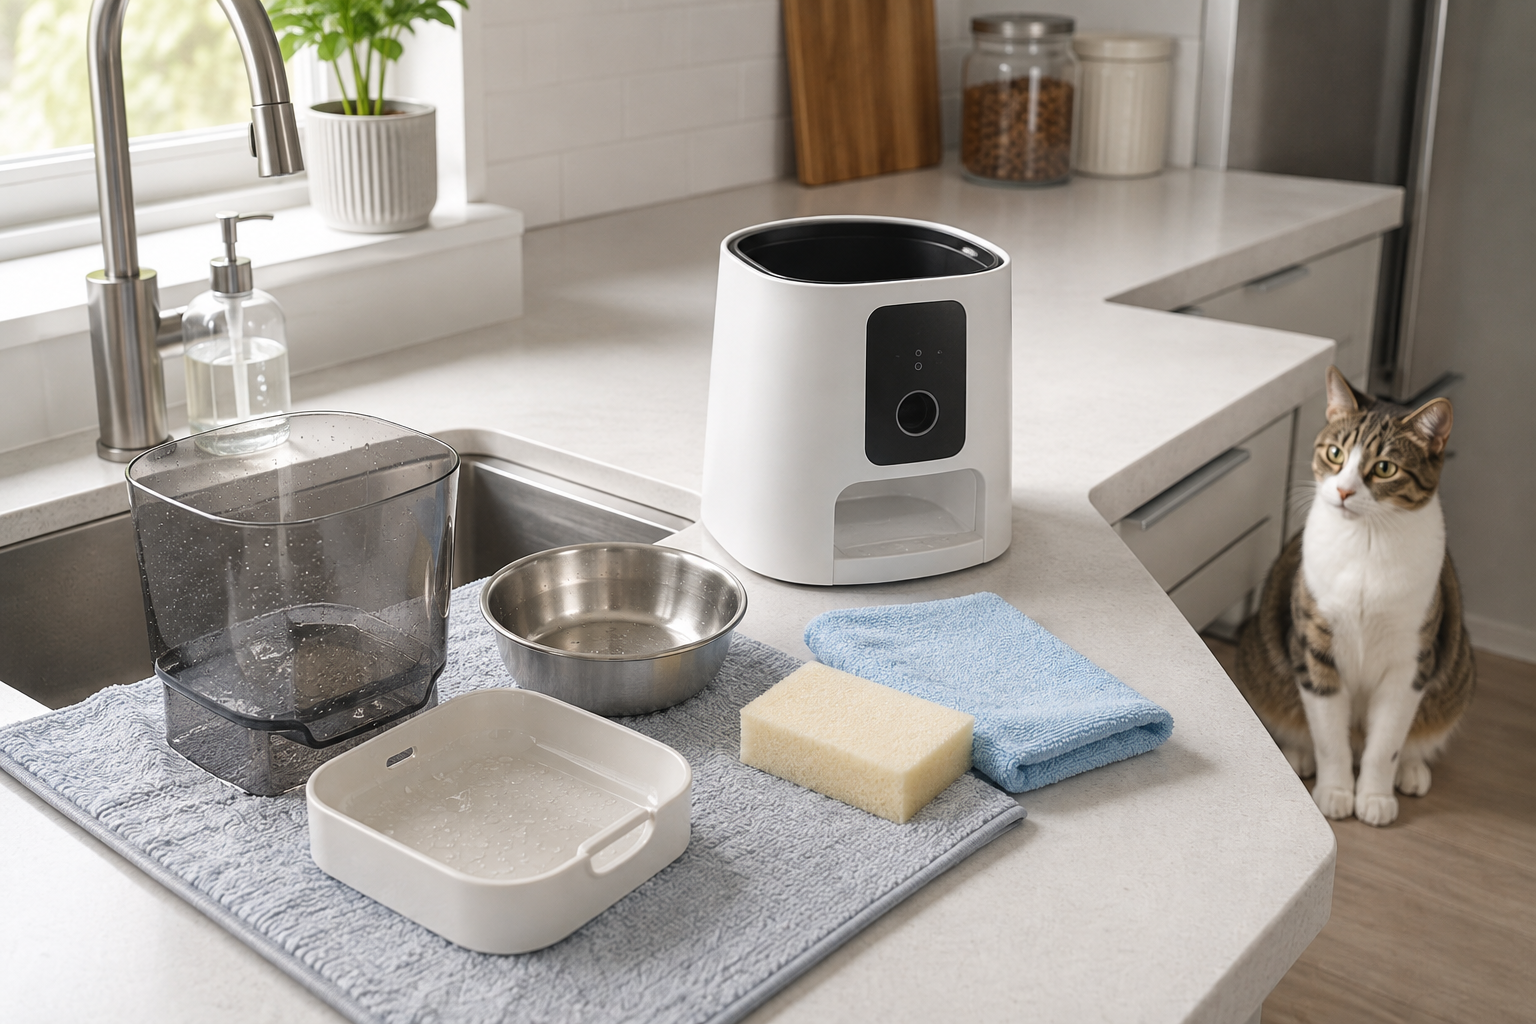
Automatic pet feeders make scheduled feeding more convenient, but they still need regular care. Kibble dust, food oils, crumbs, saliva, pet hair, and moisture can collect in the bowl, hopper, food chute, and dispensing mechanism. Over time, this buildup may cause odors, stale food, pests, mold, inaccurate portions, or feeder jams.
The challenge is cleaning the feeder thoroughly without damaging its motor, sensors, camera, Wi-Fi components, or battery compartment. This guide explains how to clean an automatic pet feeder safely, which parts may be washable, how often to clean each area, and what to check before putting the feeder back into service.
Automatic feeders vary by brand and model. Always check your feeder’s manual before removing parts, using a dishwasher, applying a disinfectant, or allowing any component to contact water. The manufacturer’s instructions take priority over general guidance.
Quick Answer: How Do You Clean an Automatic Pet Feeder?
Unplug the feeder, remove its batteries and food, and separate the washable food-contact parts from the electronic base. Wash only manufacturer-approved parts with warm water and mild dish soap. Clean the base as directed in the manual, let every component dry completely, reassemble the feeder, and run a test meal.
Key Takeaways
– Treat the feeder as two separate areas: washable food-contact parts and an electronic base that must stay dry.
– Check your model’s manual before washing, disinfecting, or putting any part in a dishwasher.
– Clean the bowl most often, especially when serving wet food.
– Never refill the hopper until every washed component is completely dry.
– Run a small test feed after reassembly and confirm that the schedule and portion settings are still correct.
Why Regular Automatic Feeder Cleaning Matters
Dry food may look clean, but kibble can leave fine particles and fats at the bottom of the hopper and around the dispensing wheel. The bowl also comes into contact with food and saliva whenever a pet eats.
Regular cleaning helps:
– Remove food residue and unpleasant odors
– Prevent old crumbs and oils from mixing with fresh kibble
– Reduce conditions that encourage bacterial growth or mold
– Discourage ants and other pests
– Keep the chute and dispensing mechanism clear
– Reduce jams and missed meals caused by food buildup
– Reveal damaged seals, cracks, loose parts, or worn cables
– Maintain a cleaner feeding area for pets and family members
The FDA advises washing pet food bowls and scooping or measuring utensils with soap and hot water after each use. The CDC also recommends cleaning bowls, scoops, feeding mats, and placemats frequently. These recommendations apply to food-contact items; clean the electronic feeder body only as its manufacturer directs.
If you are still deciding whether automated feeding suits your household, read our guide to whether automatic pet feeders are worth it.
Know Which Parts Are Washable—and Which Must Stay Dry
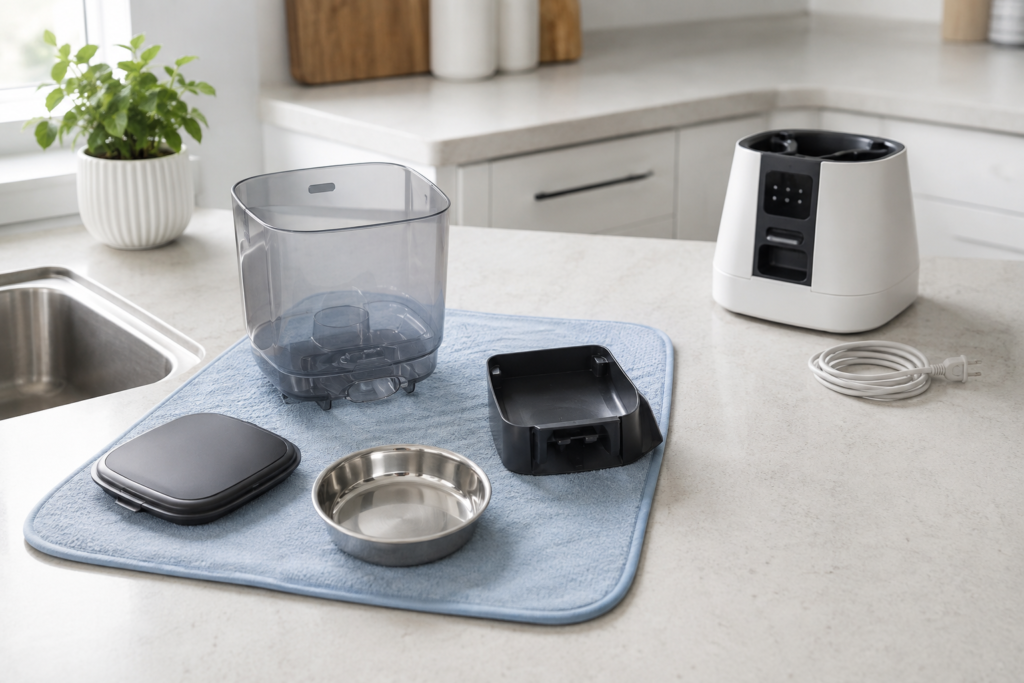
Before disassembling the feeder, separate its components into washable and non-washable groups.
Parts That May Be Washable
Depending on the model, removable parts may include:
– Stainless steel, ceramic, or plastic food bowl
– Bowl holder or feeding tray
– Food hopper or tank
– Hopper lid
– Removable tank base
– Food chute insert
– Dispensing wheel, rotor, or impeller
– Meal splitter
– Wet food tray or compartments
– Removable ice packs
Removable does not automatically mean washable or dishwasher-safe. A lid, for example, may contain buttons, sensors, seals, a desiccant compartment, or electronic components. Confirm the approved method for every part in your manual.
Parts That Usually Must Stay Dry
The following parts commonly contain electronics and should not be submerged:
– Feeder base
– Motor and internal wiring
– Power cord, plug, or USB port
– Battery compartment
– Display and control buttons
– Wi-Fi or RFID components
– Camera lens, microphone, and speaker
– Electronic sensors
Cleaning instructions can differ even among feeders from the same brand. For example, PETLIBRO instructs owners of its Granary Smart Feeder not to rinse the base or wipe it with a wet cloth. This model-specific restriction should not be applied automatically to every feeder, but it shows why checking the correct manual matters.
What You Will Need
Gather these supplies before switching off the feeder:
– Mild, preferably unscented dish soap
– Warm water
– Soft sponge or nonabrasive cloth
– Microfiber cloth
– Small soft brush or clean toothbrush
– Cotton swabs for narrow, non-electrical crevices
– Clean, dry towels
– A dry container for small removable pieces, if needed
– Your feeder’s manual or official cleaning instructions
Avoid abrasive pads, steel wool, strong fragrances, and unapproved cleaners. Scratches can make plastic more difficult to clean, while lingering odors or cleaning residue may discourage a sensitive pet from eating.
How to Clean an Automatic Pet Feeder: Step by Step
Step 1: Check the Manual and Record Important Settings
Read the cleaning and disassembly instructions for your exact model. Identify which parts are dishwasher-safe, which require hand-washing, and which must remain dry.
If you use an app-controlled feeder, take screenshots of its meal times, portion settings, time zone, and any special modes. Disconnecting power does not erase the settings on every model, but saving them makes recovery easier if a reset occurs.
Step 2: Turn Off and Disconnect All Power
Turn off the feeder, unplug its power cable from the wall and the device, and remove backup batteries if the manual instructs you to do so. Keep plugs and cables away from the sink.
Do not clean a powered feeder. Accidental activation can move the dispensing mechanism, while moisture near electrical parts creates a safety risk.
Step 3: Empty the Hopper Completely
Remove the remaining food with a dedicated pet-food scoop, then pour out loose crumbs. Before saving any unused food, inspect it for:
– A stale or rancid odor
– Greasy residue or excessive food dust
– Damp or clumped pieces
– Mold or discoloration
– Insects or pest debris
Discard food that smells unusual or appears damp, moldy, or contaminated. Avoid continually adding new kibble on top of older food because crumbs and oils can remain at the bottom of the hopper.
If you are changing to a different kibble or recipe, this is also a good time to clean the manufacturer-approved hopper and dispensing parts before adding the new food. Removing old crumbs and oily residue prevents the previous food from remaining in the feeding path and gives you a clean starting point for the new kibble.
Step 4: Remove Only the Approved Components
Remove the bowl, tray, lid, hopper, and approved dispensing parts in the order shown in the manual. Do not force a part that resists. Some hoppers use locking tabs or a rotating base that must be released in a particular direction.
If the arrangement is unfamiliar, take a quick photo during each stage. Place clips, seals, screws, or other small pieces in a container so they are not lost.
Step 5: Wash the Food Bowl and Feeding Tray
The bowl receives food and saliva every day, so it usually needs more frequent cleaning than the motorized assembly.
- Wash the bowl and approved tray with warm water and mild dish soap.
- Scrub the food-contact surface, rim, underside, and edges with a soft sponge.
- Rinse thoroughly until no soap or odor remains.
- Air-dry or dry with a clean towel.
Use a dishwasher only when the manufacturer labels the exact component dishwasher-safe. The CDC says dishwasher-safe pet bowls can be cleaned in a dishwasher, but this general guidance does not override a feeder manufacturer’s temperature, rack position, or material restrictions.
Step 6: Clean the Hopper and Lid
If the hopper and lid are approved for washing, use warm water, mild dish soap, and a soft sponge. Pay particular attention to bottom corners, the lid seal, and other places where crumbs and food oils collect. Rinse thoroughly.
If the lid contains electronics or a desiccant bag, remove the desiccant as directed and do not soak the lid unless the manual expressly permits it. A desiccant bag is normally a replaceable moisture-control item, not a washable part. Follow the manufacturer’s replacement instructions.
Check the seal for crumbs, cracks, distortion, or looseness. A damaged seal may allow humidity or pests to reach the food.
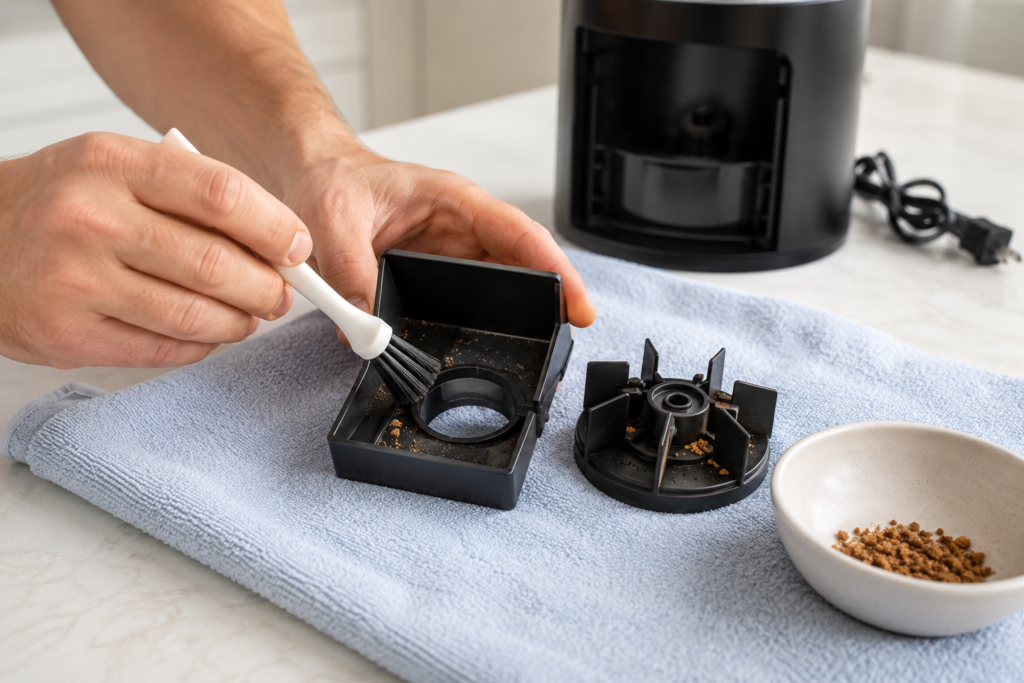
Step 7: Clear the Food Chute and Dispensing Mechanism
The food chute and rotating mechanism are common hiding places for broken kibble, powder, and oily residue.
For a removable, washable mechanism:
- Remove it exactly as the manual shows.
- Brush away dry crumbs first.
- Hand-wash it only if approved.
- Rinse and dry every slot, fin, and corner completely.
For a fixed mechanism:
- Keep the feeder unplugged.
- Use a soft, dry brush or cloth to loosen crumbs.
- Use a cotton swab for accessible crevices without pushing debris farther inside.
- Use a barely damp cloth only if the manual permits it.
- Never pour water into the food outlet or force the motor to turn.
Do not dismantle gears, wiring, or the motor housing unless the manufacturer designed those parts for user removal.
Step 8: Clean the Electronic Base
Move the base away from standing water. Remove crumbs with a dry cloth or soft brush. If the manual allows damp wiping, apply water or an approved cleaner to the cloth—not directly to the feeder—and wring the cloth out well before use.
Wipe approved exterior areas while keeping moisture away from:
– Power and charging ports
– Battery terminals
– Ventilation openings
– Screen edges and buttons
– Motor housing
– Speaker and microphone openings
– Camera and sensor openings
Follow with a dry microfiber cloth. If the manual specifies dry cleaning only, do not use a damp cloth.
Step 9: Clean Smart-Feeder Sensors and the Camera Carefully
Dust on a food-level or obstruction sensor may interfere with alerts or operation. Follow the model’s instructions and use a clean, dry microfiber cloth or dry cotton swab. Never spray glass cleaner or disinfectant directly onto a sensor.
For a feeder with a camera, gently wipe the lens with a clean microfiber lens cloth. Avoid paper towels, rough materials, and excess pressure, which may scratch or smear the lens.
For more help comparing cleaning access and other practical features before buying, see our guide on how to choose the right automatic pet feeder.
Step 10: Let Every Part Dry Completely
Complete drying is essential. Moisture trapped in the hopper or dispensing path can make kibble clump, encourage mold, or damage electronic parts.
Place washed pieces on a clean drying rack or towel in a well-ventilated area. Check seams, seals, screw holes, the underside of the hopper, and narrow channels. Do not reassemble the feeder merely because its outer surfaces look dry.
Before reassembly, turn hollow or recessed parts over and check for trapped water around seams, seals, screw holes, chute openings, and the underside of the hopper. If you are unsure whether an internal channel is completely dry, allow additional air-drying time rather than refilling it with food.
Avoid intense direct heat unless the manual allows it, as excessive heat may warp plastic or damage seals.
Step 11: Reassemble the Feeder
Reinstall each component in the reverse order of removal. Confirm that:
– The dispensing wheel or tank base is seated correctly
– The hopper locks into place
– Seals lie flat and are not pinched
– The food chute is unobstructed
– The bowl and tray align with the outlet
– The lid closes securely
– The battery compartment is dry and closed
– No clips, screws, or accessories remain unused
An incorrectly fitted rotor or hopper may cause grinding sounds, inconsistent portions, food leaks, or failure to dispense.
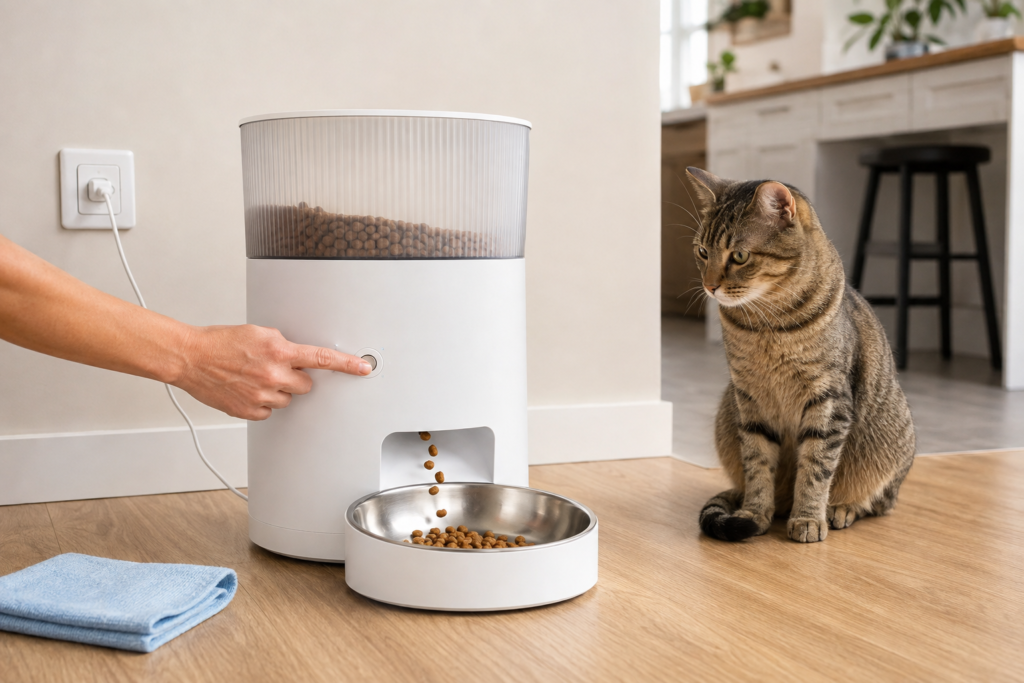
Step 12: Refill With Fresh Food and Run a Test Meal
Add a small amount of fresh, suitable food rather than filling the hopper immediately. Reinstall the batteries if required, reconnect the power cable, and run a manual feed cycle.
Check that:
– Food moves through the chute smoothly
– The portion appears consistent
– The motor sounds normal
– The bowl sits in the correct position
– The app reconnects and reports the expected status
– Meal times, portion sizes, time zone, and notifications remain correct
Run more than one small test if you removed the dispensing mechanism. If portion accuracy matters or you changed kibble at the same time, weigh several test portions and compare their average with your previous calibration. Recalibrate the feeder if the output has changed meaningfully before relying on the existing schedule. Do not rely on the feeder for an unattended meal until it is operating normally.
Consider the feeder ready for normal use only when it dispenses smoothly, delivers the expected measured amount into the bowl, retains the intended schedule and settings, and completes an automatically scheduled meal correctly.
After cleaning or reassembly, observe at least one scheduled feeding when practical. This confirms not only that the mechanism dispenses food manually, but also that the feeder’s clock, saved schedule, portion settings, and automatic operation are working as expected.
How Often Should You Clean an Automatic Pet Feeder?
There is no single deep-cleaning interval for every feeder. Food type, feeder design, number of pets, room humidity, and the manufacturer’s instructions all affect the schedule.
Cleaning is also a good time to inspect the feeder for maintenance problems. Check seals and locking tabs for damage, make sure the dispensing mechanism moves normally, inspect the power cable and battery compartment, and confirm that sensors, the food outlet, and the bowl remain unobstructed. Replace damaged user-serviceable parts according to the manufacturer’s instructions rather than continuing to use a feeder that no longer closes, seals, or dispenses reliably.
The CDC’s general example recommends cleaning wet food bowls after every use and dry food or water bowls daily. The FDA gives the more cautious advice of washing pet food bowls after each use. Use the schedule below as a practical starting point, then follow any stricter instructions supplied with your feeder.
| Feeder Area | Practical Starting Schedule |
|---|---|
| Food bowl | After each use, follow FDA advice; at minimum, follow the feeder manual and current public health guidance. |
| Wet-food tray or compartment | After every meal or use. |
| Feeding mat and bowl holder | Daily or whenever soiled. |
| Dry-food hopper and lid | Inspect at every refill; clean before adding a new batch or as the manual directs. |
| Food chute and dispensing wheel | Inspect weekly; clean when crumbs or oily residue appear and during a full cleaning. |
| Electronic base | Inspect regularly and clean whenever soiled, using only the manufacturer-approved method. |
| Sensors and camera lens | Clean gently when dusty or when alerts or images become unreliable. |
| Full feeder | Follow the manufacturer’s recommended interval, and clean sooner if you notice residue, odor, pests, moisture, or dispensing trouble. |
Clean more often when food is oily or crumbly, several pets share the feeder, the room is humid, or saliva frequently collects around the outlet and bowl.
Cleaning Dry-Food and Wet-Food Feeders: Key Differences
Dry-Food Automatic Feeders
Dry-food feeders need particular attention around the hopper, chute, rotor, and sensors because kibble dust can accumulate even when the outside looks clean. Never refill a damp hopper; add kibble only when every part is fully dry.
Wet-Food Automatic Feeders
Wet-food feeders require prompt cleaning because moist food is perishable and leaves more residue. Remove leftovers and wash approved trays or compartments after every meal. Do not simply remove leftover wet food and refill the same unwashed compartment. Food residue and saliva can remain on the tray even when it looks empty, so wash and dry the manufacturer-approved food-contact parts before reuse. Clean lids, seals, and reusable cold packs as the manual directs.
Follow the food label and feeder instructions for safe holding times and temperatures. A lid or ice pack does not keep wet food safe indefinitely.
Should You Disinfect an Automatic Pet Feeder?
Cleaning and disinfecting are different. Cleaning removes dirt and many germs with soap, water, and scrubbing; disinfecting uses chemicals to kill germs. The CDC says routine cleaning is usually sufficient for most pet items, while disinfection may be appropriate in certain situations, such as illness or higher household risk.
Do not apply bleach, alcohol, vinegar, essential oils, or household disinfectant inside a feeder unless both the product label and feeder manufacturer permit its use on that specific food-contact material. Chemicals can damage plastics, seals, and electronics or leave unwanted residue.
If disinfection is necessary, first check the feeder manual. Use a product suitable for the material, follow its dilution, contact time, rinsing, and drying directions exactly, and keep pets away until the item is safe and completely dry. The CDC also advises cat owners not to use disinfectants containing phenol because phenols are very toxic to cats.
If recalled or contaminated food was used, follow the recall notice and current public health instructions. Contact a veterinarian if your pet may have eaten contaminated food or shows signs of illness.
Common Automatic Feeder Cleaning Mistakes
Submerging the electronic base. Most bases are not designed for immersion, which may damage the motor, circuit board, display, Wi-Fi hardware, or battery compartment.
Assuming every removable part is dishwasher-safe. Dishwasher heat can warp some plastics and seals. Look for explicit approval for the exact part.
Spraying cleaner directly onto the feeder. Liquid can enter seams, ports, sensors, and speaker openings. Apply an approved product to the cloth instead, if damp wiping is permitted.
Reassembling damp components. Remaining moisture can contribute to clumped kibble, odors, mold, jams, and electronic damage.
Forcing the rotor or hopper. Locking tabs and directional-release parts may crack or become misaligned when forced.
Continually topping up old food. Empty and inspect the hopper periodically so old crumbs and oils do not remain beneath every new batch.
Skipping the test feed. Cleaning can disturb the rotor, bowl, power source, Wi-Fi connection, clock, or schedule. A manual test can catch a problem before your pet misses a meal.
Troubleshooting After Cleaning
The Feeder Does Not Dispense
Check the power supply and batteries. Confirm that the hopper and dispensing wheel are locked correctly, the chute is clear, and the bowl is positioned properly. Review the app for jam or low-food alerts. If the problem continues, stop using the feeder and contact the manufacturer.
The Feeder Dispenses Too Much or Too Little
Make sure the rotor and tank base are installed correctly. Confirm the programmed portion size and use a food shape and kibble size approved by the manufacturer. Run several controlled test portions rather than judging a single cycle.
The App or Wi-Fi Does Not Reconnect
Confirm that the feeder has restarted fully, the correct Wi-Fi network is available, and the clock and time zone are accurate. Follow the manufacturer’s reconnection steps instead of repeatedly factory-resetting the feeder, which may erase its schedule.
The Feeder Still Smells
Look for missed residue beneath seals, inside removable chute parts, under the bowl holder, or at the bottom of the hopper. Inspect plastic parts for deep scratches or absorbed odors. Replace damaged food-contact components when cleaning no longer restores them.
Kibble Clumps or Jams Soon After Cleaning
Stop the feeder and discard damp or affected food. Moisture may remain in a seam, or the kibble may not be suitable for the mechanism. Dry the feeder again and check the food size range stated in the manual.
Frequently Asked Questions
How Often Should I Clean an Automatic Cat Feeder?
Clean the food bowl frequently according to current public-health guidance and your feeder manufacturer’s instructions; wet-food trays generally need cleaning after every use. Inspect the hopper, chute, and dispensing mechanism regularly and clean them whenever food dust, oils, moisture, or residue accumulate. There is no single deep-cleaning interval for every automatic cat feeder, so follow your model’s manual and clean sooner if you notice odor, pests, moisture, mold, or dispensing problems.
How Do I Open an Automatic Cat Feeder for Cleaning?
Unplug the feeder and check the cleaning or disassembly instructions for your exact model before opening it. Remove only the bowl, hopper, lid, tray, or dispensing parts that the manufacturer identifies as user-removable. Do not force locking tabs, twist-resistant parts, or the electronic housing. If the correct release method is unclear, use the manufacturer’s manual or official support instructions rather than trying to pry the feeder apart.
Can Automatic Pet Feeder Parts Go in the Dishwasher?
Only if the manufacturer identifies those exact parts as dishwasher-safe. Never put the electronic base, motor, power cable, camera, sensor assembly, or battery compartment in a dishwasher.
Can I Wash the Inside of an Automatic Feeder?
You can wash a removable hopper and other food-contact components only when the manual says they are washable. Do not pour water into a fixed hopper, chute, or electronic base.
What Soap Is Safe for an Automatic Pet Feeder?
Mild dish soap is generally suitable for manufacturer-approved washable parts. Avoid abrasive, heavily scented, or harsh products. Rinse every part thoroughly and dry it completely.
Can I Use Vinegar to Clean an Automatic Pet Feeder?
Do not assume vinegar is suitable for every feeder or an effective disinfectant. The CDC notes that evidence is insufficient to show how well vinegar cleans or kills germs. Use soap or detergent for routine cleaning, and follow the manufacturer’s instructions for the feeder’s materials.
Why Does My Automatic Pet Feeder Smell Bad?
Common causes include old kibble, accumulated food oils, saliva around the bowl, damp food, residue in the chute, or scratched plastic. Empty the unit, inspect the food, clean all approved removable parts, and let them dry fully.
Can a Dirty Feeder Stop Dispensing Food?
Yes. Crumbs, oily powder, or clumped food can obstruct the chute or rotor, while dust may interfere with some sensors. Mechanical or electrical faults can cause similar symptoms, so contact the manufacturer if careful cleaning does not solve the problem.
If cleaning does not restore normal dispensing, check the feeder systematically for food jams, power problems, schedule settings, and other mechanical or connectivity issues in our automatic feeder troubleshooting guide.
Should I Clean a New Automatic Feeder Before First Use?
Yes. Wash the approved food-contact parts and dry them completely before the first fill, following the manufacturer’s setup and cleaning instructions.
When Should I Replace a Feeder Part Instead of Cleaning It?
Consider replacement when a food-contact part is cracked, deeply scratched, warped, persistently odorous, mold-stained, or unable to seal or lock correctly. Use manufacturer-approved replacement parts when proper fit affects safe dispensing.
Final Thoughts
The safest way to clean an automatic pet feeder is to treat it as both a food container and an electronic appliance. Wash approved food-contact parts regularly, keep the powered base dry, clear crumbs from the dispensing path, and never refill the feeder until every component is completely dry.
A simple routine—clean the bowl after use, inspect the feeder regularly, follow the manual for full cleaning, and test the unit after reassembly—helps keep scheduled feeding dependable. Automatic feeding can support a consistent routine, but it still needs regular human checks.
If you are comparing designs that may be easier to maintain, see our research-based guide to the best automatic pet feeders.